In this blog we are going to cover about how we setup our tactical belts for airsoft usage. This way you get a better idea of the thought processes that comes along with it. So you might use some things for your own belt setup(s).
If you are looking to make an investment in good gear and equipment and support us at the same timùe, check out our store.
The setup that we are going to share with you is our personal setup we’ve come up with. This by gaining knowledge when doing this stuff and trying out different things. But, be aware that this setup is based on our opinion and experience and that it might differ from yours. We’ll be glad to talk with you guys about this topic, so share your thoughts down in the comments below.
Like we already discussed in our blog about all the different kind of tactical belts, you know they can be divided in: treaded belts, equipment belts and battle belts.

We’ve all used them in the past for quite some time and shared the advantages and disadvantages about them in that video/blog.
THE BELT WE USE
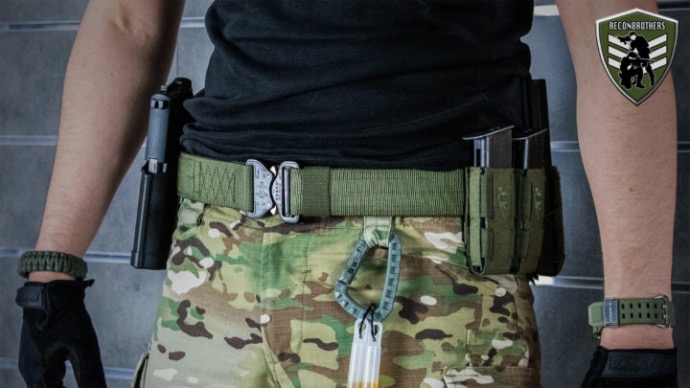
When it comes to our belts, we currently both use the equipment belt set MKII from Tasmanian Tiger.
WHY NOT ANOTHER BELT?
1. WAR BELTS

We are personally not really a fan of the padded, battle or MOLLE belts we used in the past. Because they lacked retention. They also limited our movement because of their quite bulky designs. We have never used war belts that allow to be fixed with an inner belt, so we can’t give our opinions about them.
But in overall war belts limit the attaching freedom to the places of the MOLLE/PALS loops and are more build with the purpose to carry lots of pouches. We try to limit our amount of pouches as much as possible. So, in general they’re still a no go for us. But who knows, we may change our mind some day.
2. EQUIPMENT BELTS

Why not treaded belts? The thing is, we don’t like to reattach our stuff over and over again. Since this is the case with these types of belts they are also a no-go for us.

So, why equipment belts, you ask? Well, they are slim in design and provide lots of movement capabilities. They have a great retention for the amount of stuff we attach on them. And we have almost 360 degree of attaching freedom.
Only downside is their portability with jackets, but that’s the case with most tactical belts.
OUR TACTICAL BELT SETUP:
First, when setting up your belt it’s important to know how it will interact with your plate carrier. Or whatever else you use while you’re doing things like running, kneeling, laying down and all that kind of stuff. It’s also important to put the things you change to the test. This way you can find out if it works for you.
We base our setup on 3 fundamentals, namely:1. easy access
2. efficiency of movement
3. minimal stuff
1. THE FRONT

We never carry any sort of pouch on our belly under our carrier. This has to do with the reason that when you crouch, such kind of pouches can push up in your carrier. This might even loosen your magazines above it. This is in our eyes an inefficiency of movement we want to avoid.

Something we do use a Taclink on our front to carry our gloves when we don’t need them. Also chemlights can easily be taken from here to mark certain areas. But how do we attach these to be easily accessible without losing them?
Well, we use small cable ties. We put these on our left front side, because then our non-dominant support hand can easily reach it. While we’re still able to do stuff with our dominant right hand.
2. THE LEFT SIDE

We are both right-handed shooters, so our 9 o’clock is our support side and there we have the first two pouches. First we have our TT SGL Pistol MCL pouches. And behind that we carry a TT SGL mag MCL pouch. They are all multi-caliber pouches, so they allow for a lot of different AR and pistol mags.
We place our pistol mags in front of our AR mags. Because doing it the other way around would make it difficult to grab for the smaller pistol mags. All these pouches are fast mag pouches that allow for a quick access to a fresh magazines. The reason for that is, in most cases the easiest and fastest access for a fresh magazine is on your belt. Having to deal with too much retention, makes fast access unnecessarily difficult. The chance for losing a mag might be bigger but we’ve never lost a mag with these.
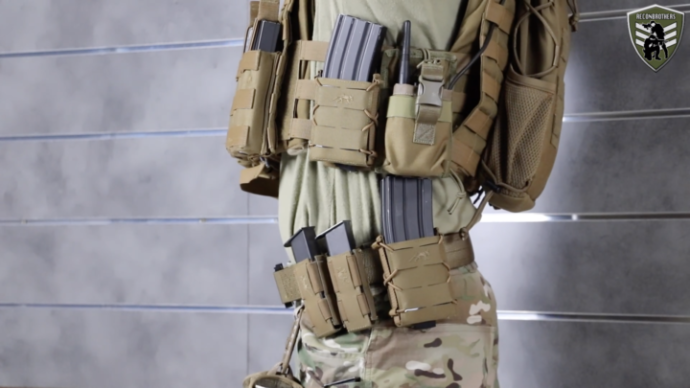
By the way, we always put the magazines that are well-retained on our plate carrier, but that’s for another video/blog. We also make sure that our magazines on our belt don’t interfere too much with the stuff we carry on our carrier.

The two pistol mags are faced forward while the AR mag is faced to our back. This is because it fits our reload method best. Also the spot and space you give each pouch is important to think about.
We put our mag pouches as much to our front as possible to allow for an easy grab. But not that much that the magazines would interfere with our belly for when we bend forward to go for a crouch position for example.
Also the minimum space needed between pouches is important, to avoid your magazines to cling to each other. The best way to put that to the test is by simply doing a few jumps while wearing the belt
We have seen some guys running around with double layers of AR pouches or pistol pouches on top of AR pouches. We personally don’t do that stuff, because we think it makes one side quite heavy and limits movement capabilities. For example, if you have to lay down on your side it won’t be a pleasant experience. Also passing through doors or narrow spaces might become a hassle like this.

By the way, if we really think we need a large amount of magazines than we rather make our teammates carry some extra on their back. Success in this world is based on team efforts after all.
3. THE BACK
We used to carry a dump pouch in the past but have stopped using them. Because once such a pouch start to fill up, a lot of weight is being moved to that single spot. And when you lay or sit down or when it starts to swing around when you move, it can become extremely annoying. It also makes a lot of noise from the mags clinging to each other.

Instead, we keep our left-side pocket of our pants empty to drop our empty magazine in. Or we use our fast mag pouch to switch a fresh mag with an empty mag. And when there is enough cover or when we are in the spawn area, we switch our fresh mags to our fast mag pouches.
Now, what are our plans with that empty space on the back? We are going to put a small IFAK or Individual First Aid Kit over there. Only question that remains is what to put inside of it and we probably should follow a first-aid course to actually put it to use for when accidents happen.
4. THE RIGHT SIDE
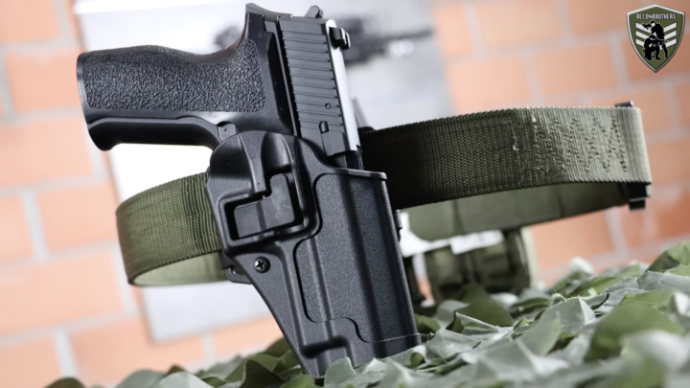
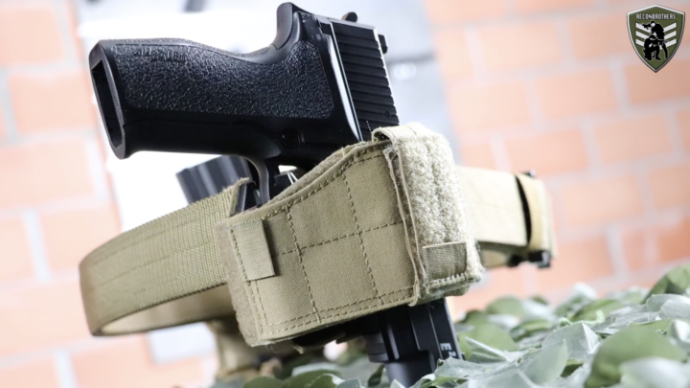
Next we have our holster. We are currently running with the Blackhawk Serpa CQC and Universal Pistol Holster from Warrior Assault systems for our TM P226 E2. One prefers to carry his holster exactly on his 3 o’clock while the other rather carries it sightly more to the front. This just comes down to personal preference and is something you have to test out.
Why do we both carry it on belt height and not below that? Like on a drop-leg platform for example?
We once had airsoft versions of a drop-leg holster and we absolutely hated it. When running around, the thing was jiggling around like crazy. Even in such way that one of us lost his pistol and had to go search it. And that really really sucked!
And yeah, we know it was just some crappy airsoft holster, and we’ve never used one of the better ones out there. So we cannot give our thoughts about them. But this lead us to use our stuff like this.
We know these drop-leg holsters look amazing, but carrying them down to your leg requires you to do a very complex inefficient movement when reaching for your sidearm. So, some remove a strap and carry them up higher to a point where your reach is more direct. This might even be more efficient than what we do nowadays by carrying it on our belt. We haven’t done that yet but it’s something to think about as well.
So that’s the setup we currently use for our tactical belts. A very simple but efficient belt setup for what we currently do in our sport. Hope this gave you some ideas to apply on your own stuff.
THANKS FOR READING!
Hope this video/blog was helpful. Please share it with friends if you think it might be helpful for them too.
